Storage
Storage is a service that allows you to create a NAS (Network Attached Storage) on your network. It uses Samba to provide SMB shares, you can mount USB drives or use the built-in storage (if you have a device with the M.2 SSD).
Mounting Drives
Mounting a drive is simple, just click on "Add Mount Point" button and you should see a new form pop up, like this:
Services - Storage - New Mount Point
Once you click on the "Create Mount Point" button you should see the new mount point in the table, like this:
Services - Storage - Mount Points
Deleting Mount Points
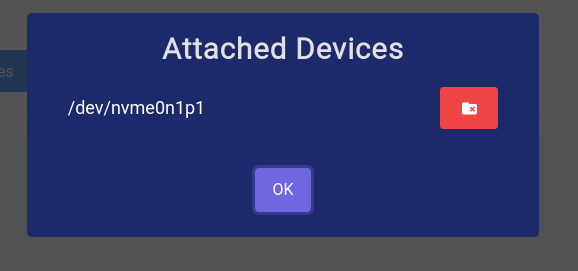
To delete a mount point, just click on the red delete button. Sometimes the delete doesn't go through completely since the drive might still be in use by Samba or some other service, in that case click on "View Attached Devices" and then click the delete button (red) next to the device you want to delete.

Services - Storage - Attached Devices
Samba
Settings
The underlying Samba server is fully configurable, you can change the workgroup, description, etc.
Services - Storage - Samba - Settings
The interface you select is crucial, if you're using the WAN interface then you'll be exposing your shares to the internet, so make sure you know what you're doing.
Shares
You can create Samba users by clicking on the "Add New User" button, you should see a new form pop up, like this:
Services - Storage - Samba - Create User
Once you click on the "Create User" button you should see the new user in the table, like this:
Services - Storage - Samba - Users Table
You can add these users to every share you create.
You can create Samba shares by clicking on the "Add New Share" button, you should see a new form pop up, like this:
Services - Storage - Samba - Create Share
Let's go over all the options:
Share Name
This is the name of the share, it will be visible to everyone on the network. When you're mounting the share you should specify this name. For example if you name the share share then you should mount it like this:
Path
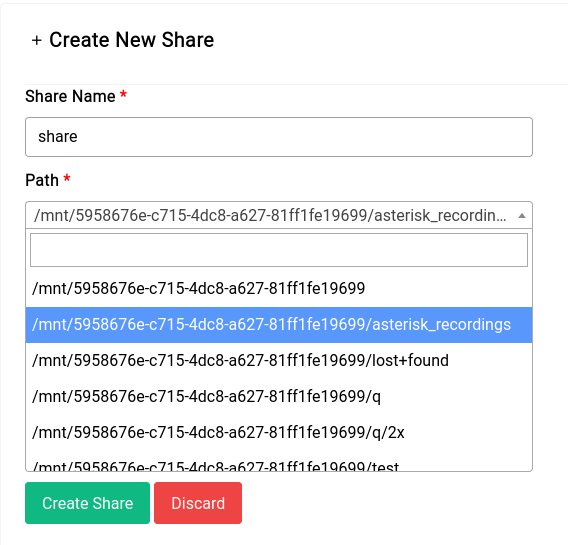
This is the path to the folder you want to share, it can be the root of a drive or a folder inside a drive. In our case we've selected the asterisk_recordings directory like this:

Services - Storage - Shares - New Share
Browseable
This option allows you to hide the share from the network, if you set it to off then the share won't be visible to anyone on the network.
Read Only
This option allows you to make the share read only, if you set it to on then no one will be able to write to the share.
Guests Only
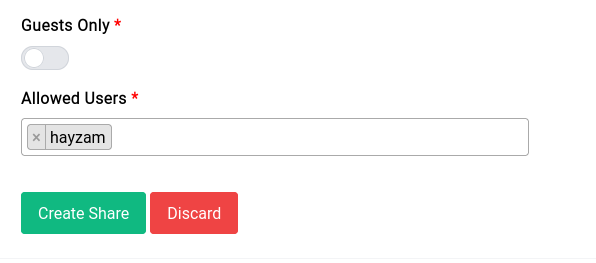
This option allows you to make the share only accessible to guests, if you set it to on then only guests will be able to access the share. If you turn it off you can see a new field appear with the users that you had created earlier, you can select the users that you want to give access to.

Services - Storage - Samba - Share Users
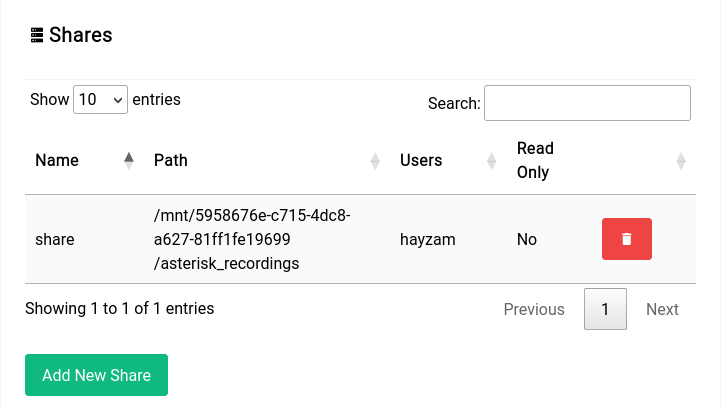
Once you've entered in all the details and clicked on "Create Share" you should see the new share in the table, like this:

Services - Storage - Samba - Table

