Cloudflare Dynamic DNS
Cloudflare is a great service and setting up dynamic DNS although not as easy as DifuseDNS it is pretty straight forward.
Setup on Cloudflare
First we need to setup a few things on the Cloudflare end.
Setting up a domain
Setting up a domain is very easy on Cloudflare, this is so that the service has something to change when we set it up on the Difuse end. In our case we will use the domain dxb-test-1.alchemilla.io with the A record 1.2.3.4 it is crucial to do this else the service on difuse end will not find anything to update on the cloudflare side of things. The reason we give the IP 1.2.3.4 is simply due to the fact that else we wont know if the service on difuse is working fine or not, if it is indeed working fine we'll know that updating works.
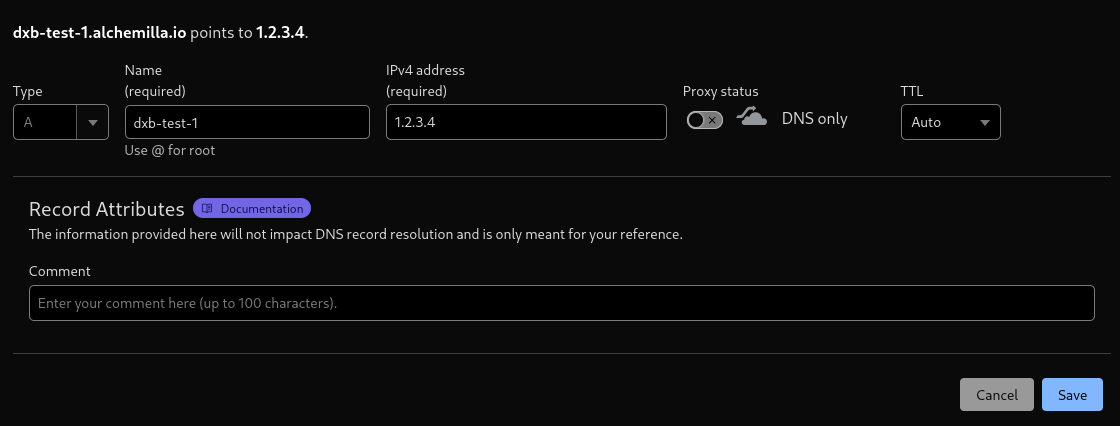
Adding Domain - Cloudflare

Added Domain - Cloudflare
Getting an API Key
No on the top right there is a user icon, click on it and you will see a profile button, click on it.
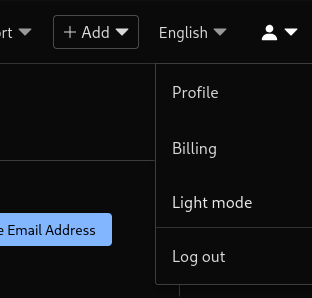
User - Profile
Click on API Tokens

User - Profile - API Tokens
Then you can click on the Create Token button, and then click on the Use Template button on the Edit zone DNS row and then in the proceeding page you can select the zone and give it a name as follows:
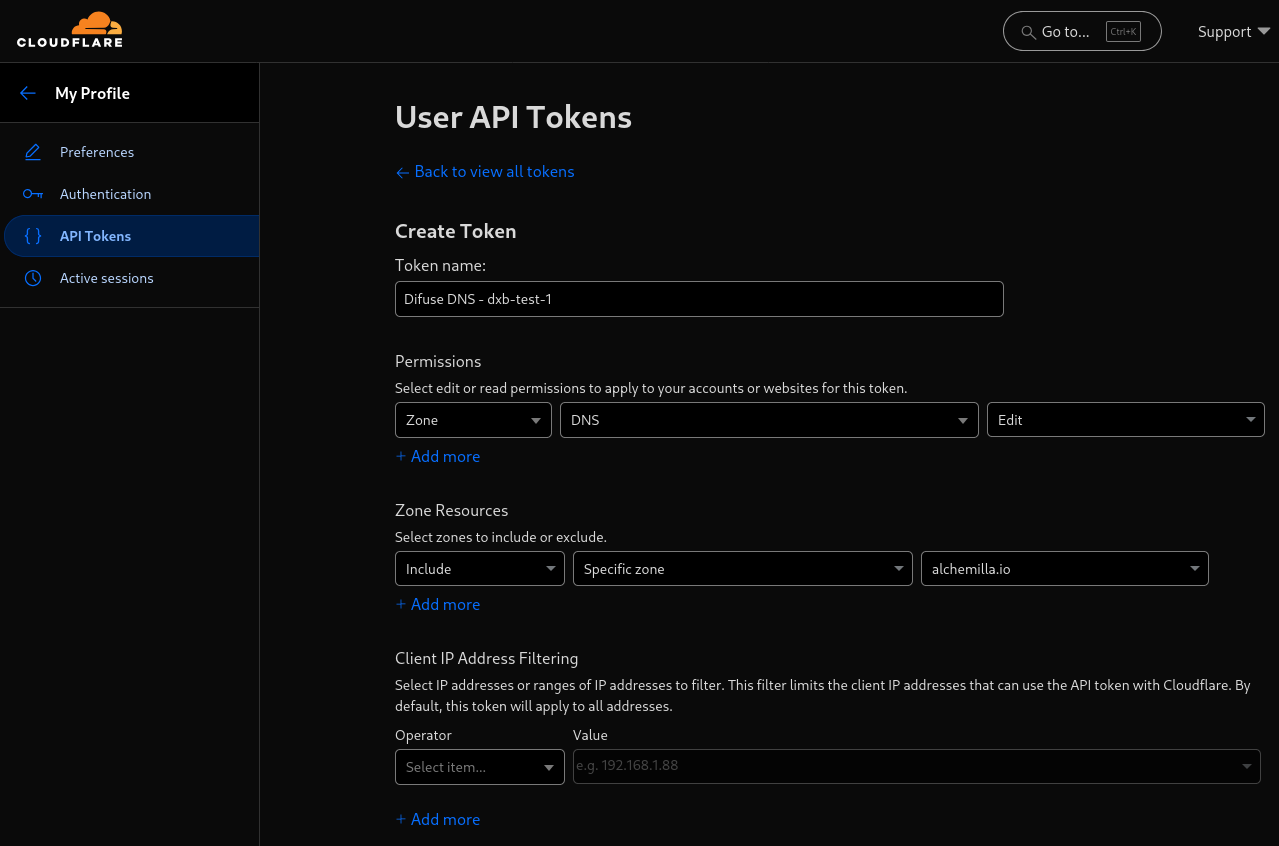
API Tokens - Create Token
In this case we click on Specific Zone under Zone Resources and select the domain we have our subdomain under, the domain we're using on difuse is dxb-test-1.alchemilla.io so we select the domain alchemilla.io
When you proceed to the next step you will be greeted with the following confirmation page
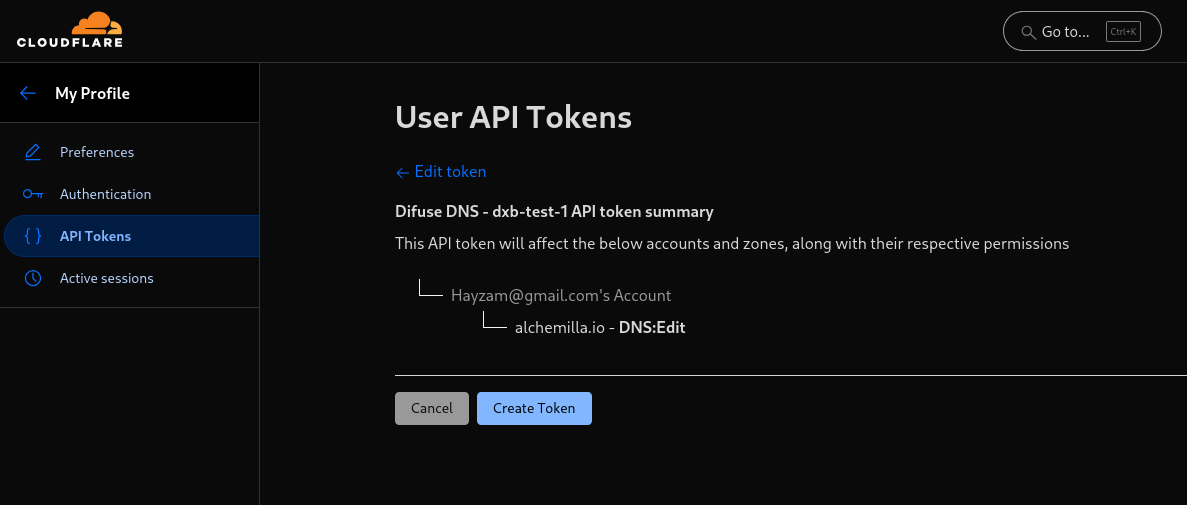
API Tokens - Confirmation
After you click on Create Token they will redirect you to a page where it shows your newly created token, copy that and paste it into a text editor somewhere.
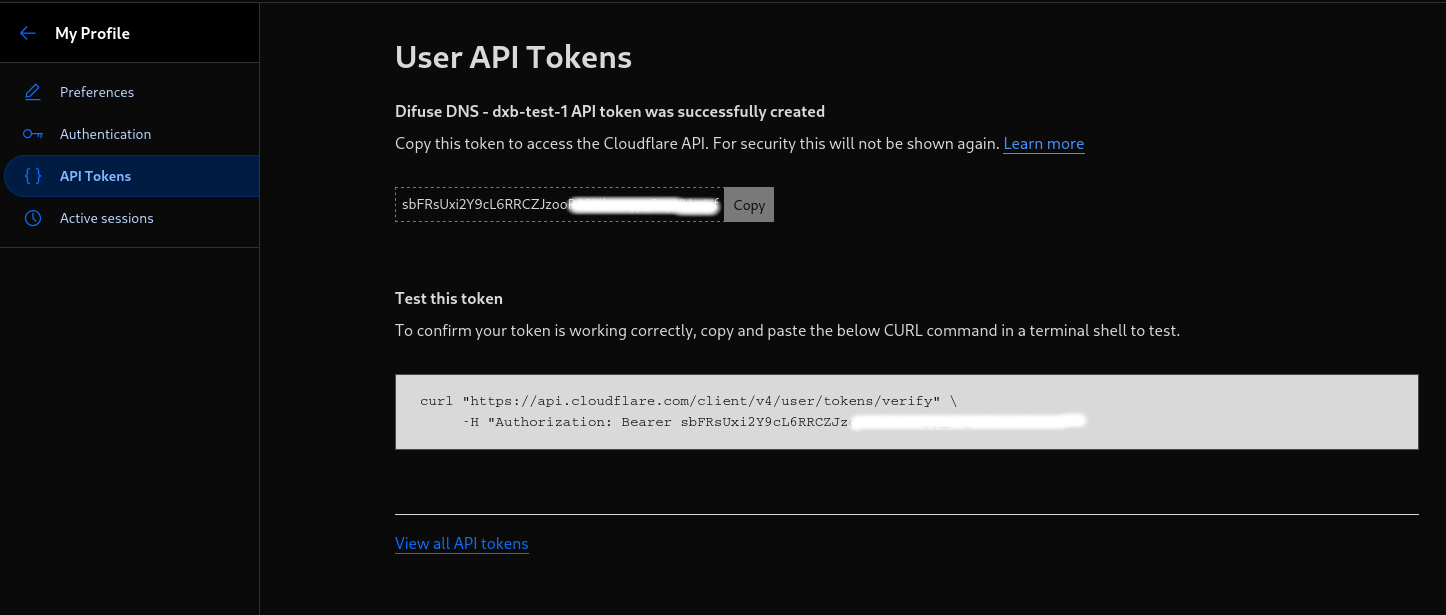
API Tokens - Created Token
Setting up on Difuse
Now setting up on difuse is pretty straight forward.
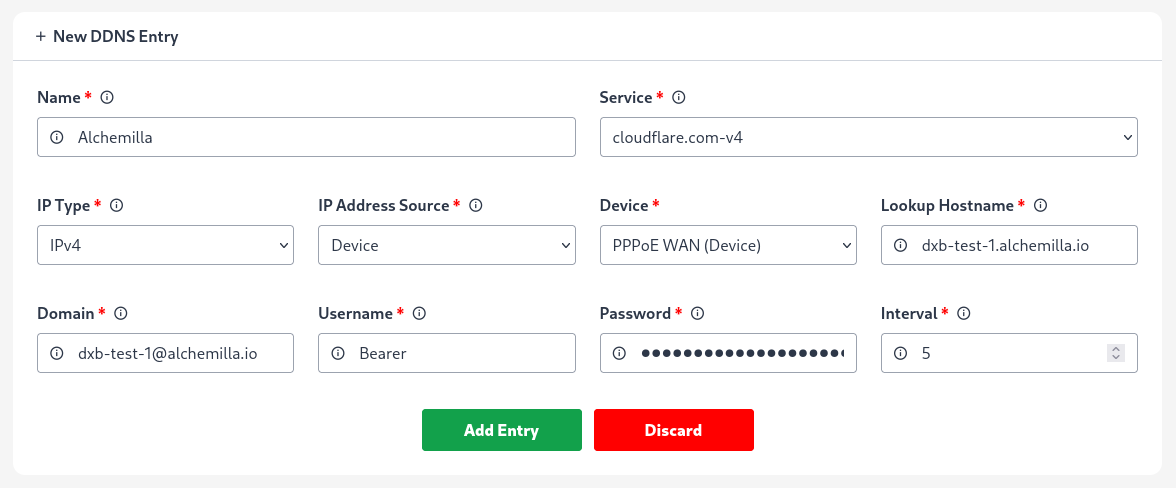
Name
Name can be anything, keep something that identifies this entry
Service
For cloudflare you need to select cloudflare.com-v4
IP Type
In this case we've selected IPv4, but you can select IPv6 as well, but you also need to make sure that on cloudflare you added a AAAA record and not an A record.
IP Address Source
We've selected device here, because we're on a PPPoE connection, but you can also select Interface or even an external URL.
Device
As mentioned we're on a PPPoE connection, so we select the PPPoE WAN device.
Lookup Hostname
Now here you just type in your sub-domain as is, in our example it is dxb-test-1.alchemilla.io
Domain
This field is special for cloudflare, you have to specify your subdomain as [email protected], so in our case it would be [email protected]
Username
In the case of cloudflare it is always Bearer
Password
You can paste the token you copied from cloudflare's website earlier, it will look something like this: scFRsUzi2Y9cL6RRCZJxooPA2Nhwoyp_3upYUmUf
Interval
You can give anything above or equal to 5 and it should be fine, if you're on a PPPoE connection something like 5 or 10 should be more than sufficient.
Viewing Records
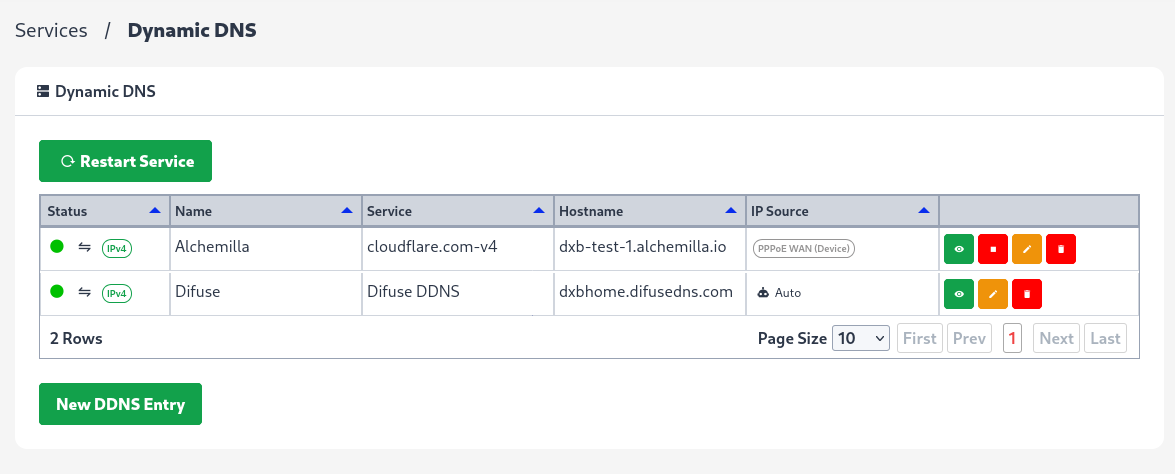
Dynamic DNS - Tabulated Records
As you can see the record is created and once the updating is done the icon on the first column will turn green, if it doesn't you can restart the service a time or two. You can even see logs by clicking on the eye button.
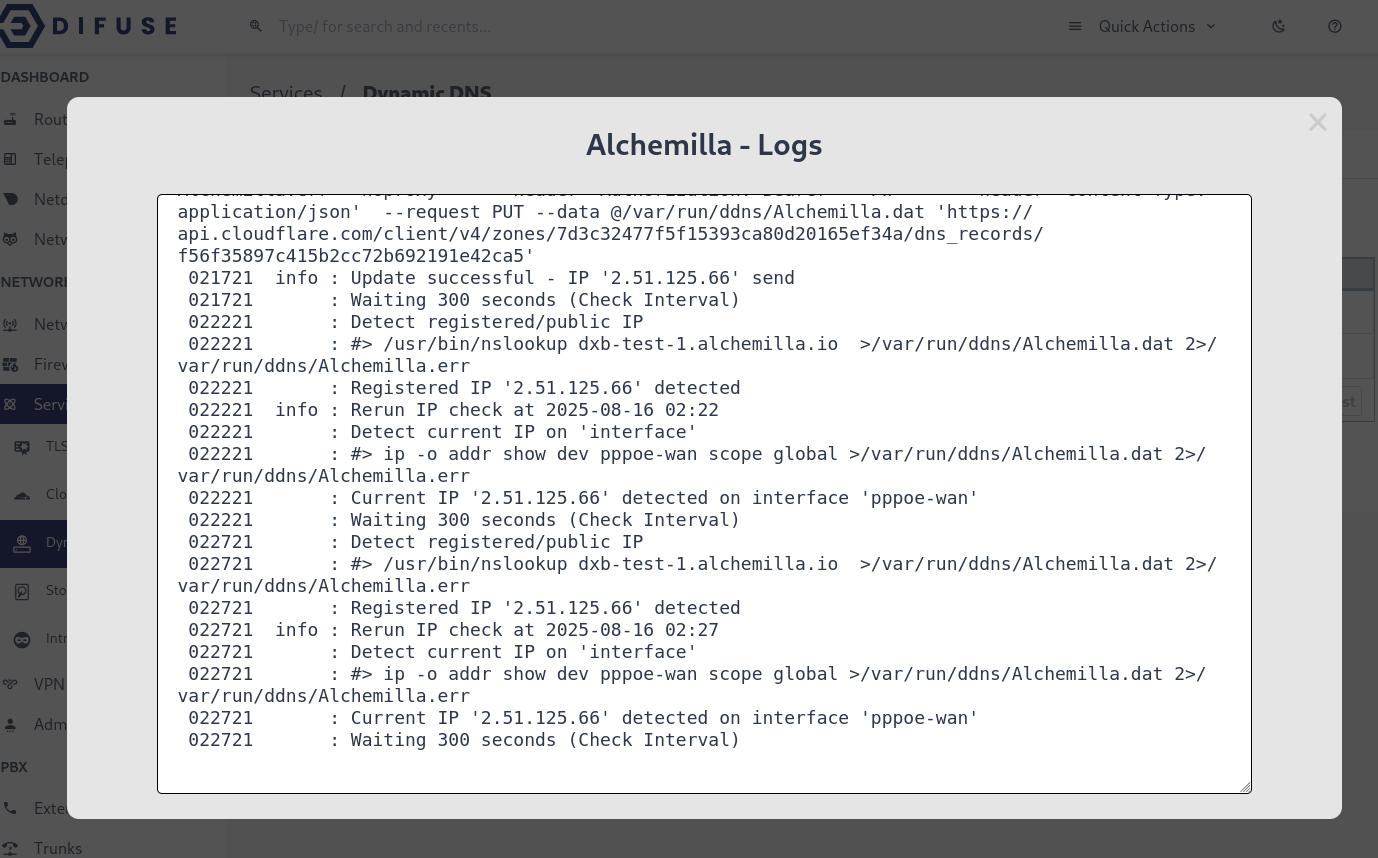
Dynamic DNS - Logs

