This is not the latest version of this documentation, for the one that is upto date, please see the latest version (2.7.0)
ACME Certificates
Two services namely the Difuse GUI and Asterisk PBX software uses TLS certificates for encryption. The device from the factory comes with a self-signed certificate. As you may already know self-signed certificates cause warnings generated on the client side and sometimes the certificate doesn’t work at all in the case of some soft phones to mitigate this the ACME certificates service comes into play.
Now we’re going to use ACME to generate Let’s Encrypt certificates and use it for both our GUI as well as Asterisk.
To set up a certificate you need to have a domain name setup already, please follow the Dynamic DNS Service guide for doing that. Once that is set up you can start the setup process as that page will no longer have a disabled link button.
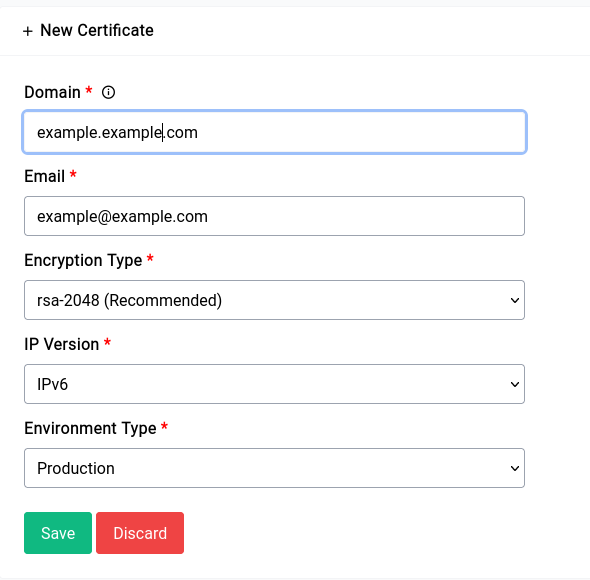
Let's go over the fields:

Services - ACME - Creating A Certificate
Domain
You can use the domain name you had set up in the dynamic DNS service page.
You need to specify a valid email address here, this is used by Let's Encrypt to send you notifications about your certificate.
Encryption Type
ec-256 is orders of magnitude faster than RSA-2048, but that being said it is also not the most widely supported encryption type across all the asterisk clients whereas RSA-2048 is. Which is congruently the reason why we recommend it.
IP Version
Coming to IP version it’s a very good idea to use the option which makes the most sense to you. If you’re under strict CGNAT it’s mandatory to run the generation on IPv6 as the CGNAT IP is not globally routable whereas the IPv6 is but if you have a regular dynamic or static IPv4 address you can pick that.
Enviroment Type
If you want to test the generation it’s a very good idea to set the environment type to staging and try generating a few times before you try out production since failing a few times on production will put you on a black list for a few hours during which you will not be able to verify/generate any new certificates.
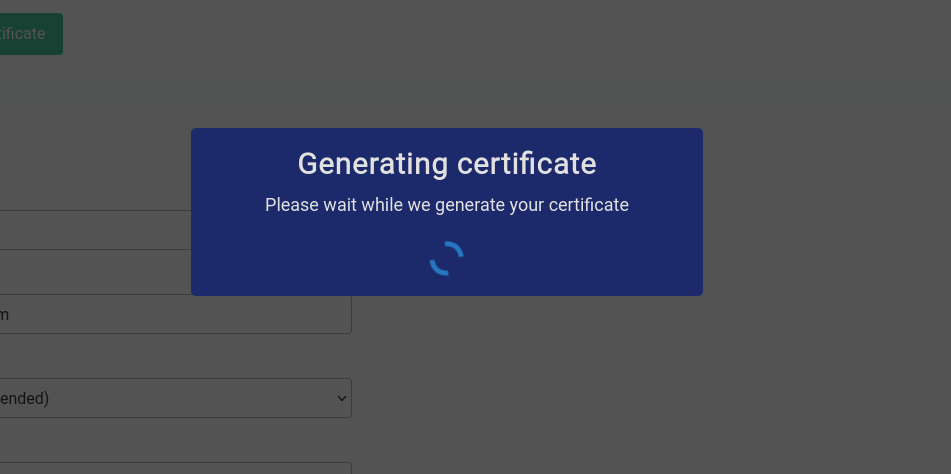
Generation of a new certificate will take a long time, which is around 2-3 minutes or sometimes even 5-10 minutes depending on factors such as your network speed, the load on ACME servers etc.
It will look something like this:

Services - ACME - Certificate Generation Step
Once it’s all set up, the table should look something like this:

Services - ACME - Tabulation
Using Certificates
Using Certificate for Asterisk
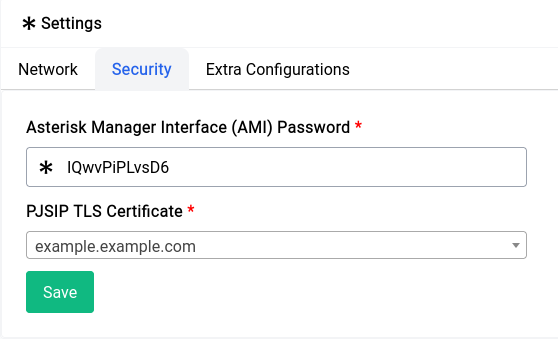
Setting up the ACME generated certificate for asterisk is trivial. Go into Settings under the PBX section and then into the Security tab where you will find 2 options one is for the AMI password and the other is for PJSIP TLS Certificate.

PBX - Settings - Using TLS Certificate
Now asterisk will start using that certificate for TLS. If you want to make sure that it applied you can always restart and-or reload the configuration using the Quick Actions menu.
Using Certificate for Difuse GUI
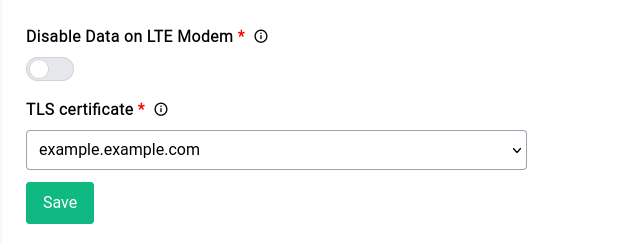
This is not really necessary but it’s a really cool thing to have, especially if you do a lot of remote administration. Just like the TLS setup for asterisk you can go into the Administration section under Routing & Services section and then go into the Miscellaneous tab.
In the Miscellaneous tab you will find the TLS certificate option, you can specify the certificate you generated and save.

System - Administration - Miscellaneous

